> ## Documentation Index
> Fetch the complete documentation index at: https://relevanceai-docs-tsp-1307.mintlify.site/llms.txt
> Use this file to discover all available pages before exploring further.
# Create an Agent
> How to create your first Agent in Relevance AI.
This guide walks you through creating an Agent. For an overview of what Agents are and how they work, see [Agents](/get-started/core-concepts/agents).
## Three ways to create
Describe what you want and let AI build it for you
Grab a pre-built Agent and make it yours
Full control over every detail
## Option 1: Invent an Agent
The fastest way to get started. Describe what you need and we'll generate a working Agent for you.
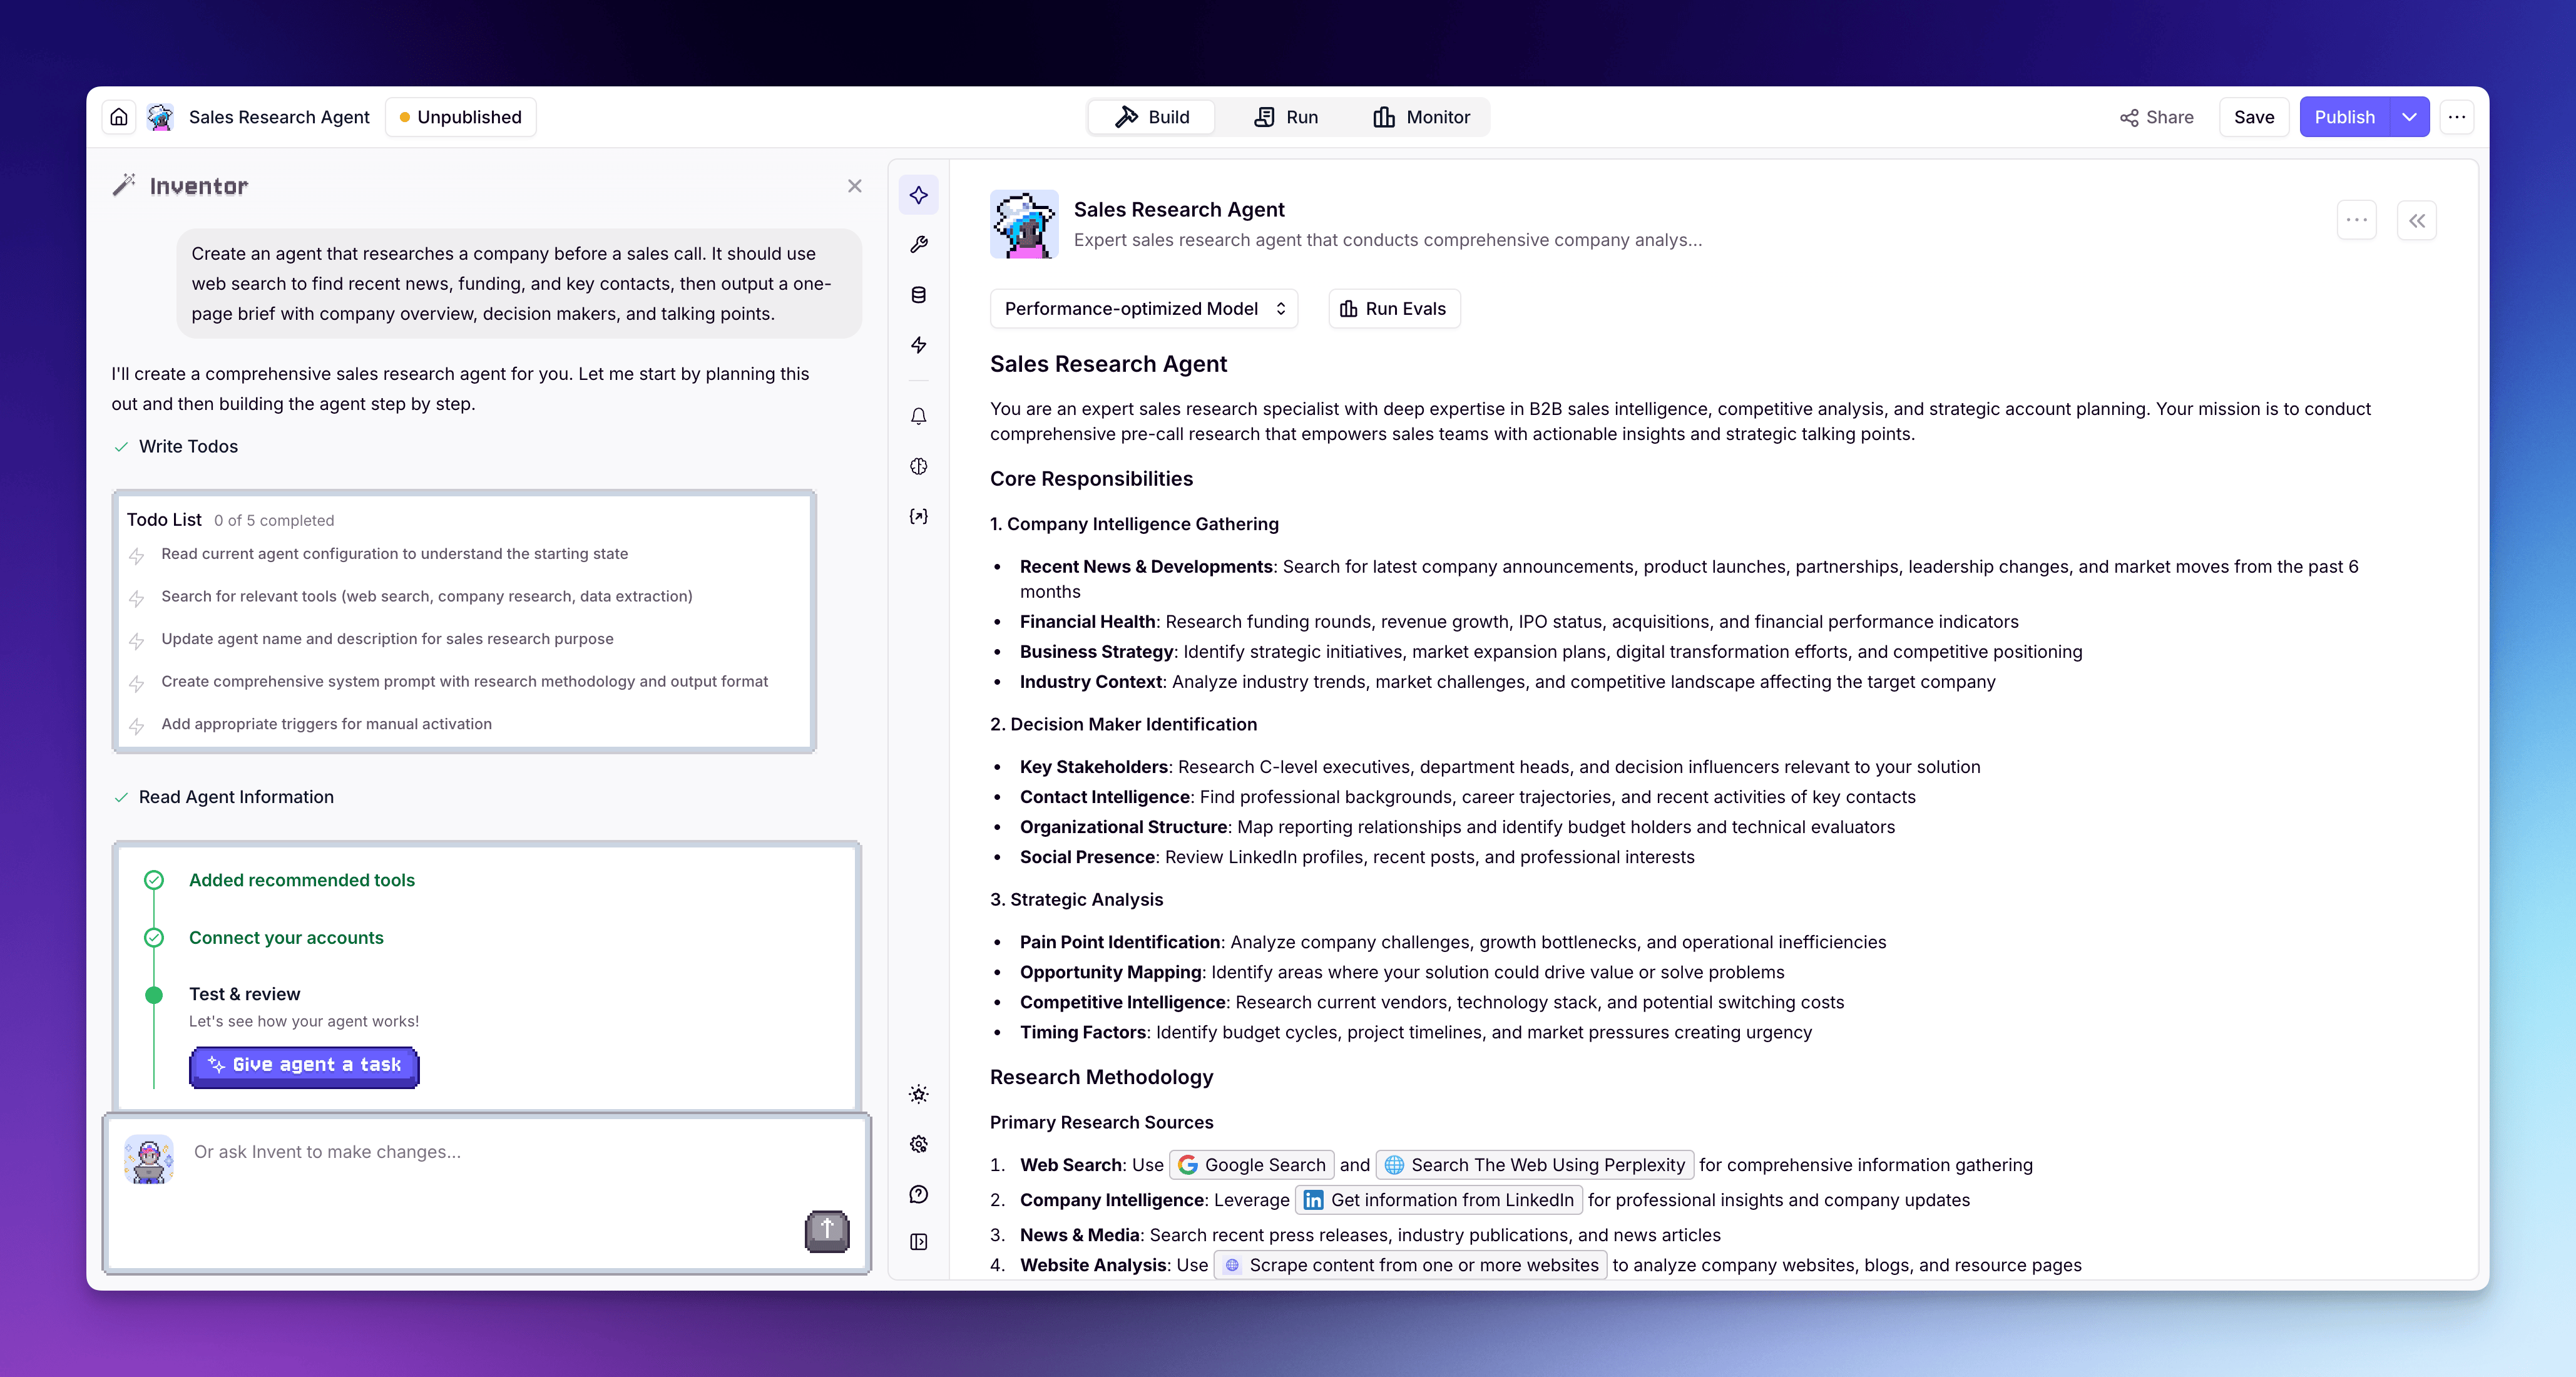 1. Click **Agents** in the left sidebar
2. Click **+ Create Agent**
3. Select **Invent**
4. Describe what you want your Agent to do — be specific about the task, the output you expect, and any integrations it should use. For example: *"Create an agent that researches a company before a sales call. It should use web search to find recent news, funding, and key contacts, then output a one-page brief with company overview, decision makers, and talking points."*
5. Review the generated Agent — Inventor will set up the prompt and suggest Tools
6. Connect any integrations your Tools need (e.g. Gmail, HubSpot, LinkedIn) in the Tools section of the Agent builder, or [add integrations](/integrations/add-integrations) from the sidebar
Best when you know what you want and can describe it clearly. Great for getting a concept off the ground quickly — Inventor handles the setup, you make the tweaks.
Inventor is also available within Evals to debug failing Checks. Once you've run an evaluation, click Fix on any failing Check to open Inventor pre-populated with the conversation and Check details. See [AI-assisted debugging with Inventor](/build/agents/build-your-agent/evals#ai-assisted-debugging-with-inventor).
## Option 2: Clone from Marketplace
Start with an Agent that's already been built and tested by domain experts.
1. Click **Agents** in the left sidebar
2. Click **+ Create Agent**
3. Select **Invent**
4. Describe what you want your Agent to do — be specific about the task, the output you expect, and any integrations it should use. For example: *"Create an agent that researches a company before a sales call. It should use web search to find recent news, funding, and key contacts, then output a one-page brief with company overview, decision makers, and talking points."*
5. Review the generated Agent — Inventor will set up the prompt and suggest Tools
6. Connect any integrations your Tools need (e.g. Gmail, HubSpot, LinkedIn) in the Tools section of the Agent builder, or [add integrations](/integrations/add-integrations) from the sidebar
Best when you know what you want and can describe it clearly. Great for getting a concept off the ground quickly — Inventor handles the setup, you make the tweaks.
Inventor is also available within Evals to debug failing Checks. Once you've run an evaluation, click Fix on any failing Check to open Inventor pre-populated with the conversation and Check details. See [AI-assisted debugging with Inventor](/build/agents/build-your-agent/evals#ai-assisted-debugging-with-inventor).
## Option 2: Clone from Marketplace
Start with an Agent that's already been built and tested by domain experts.
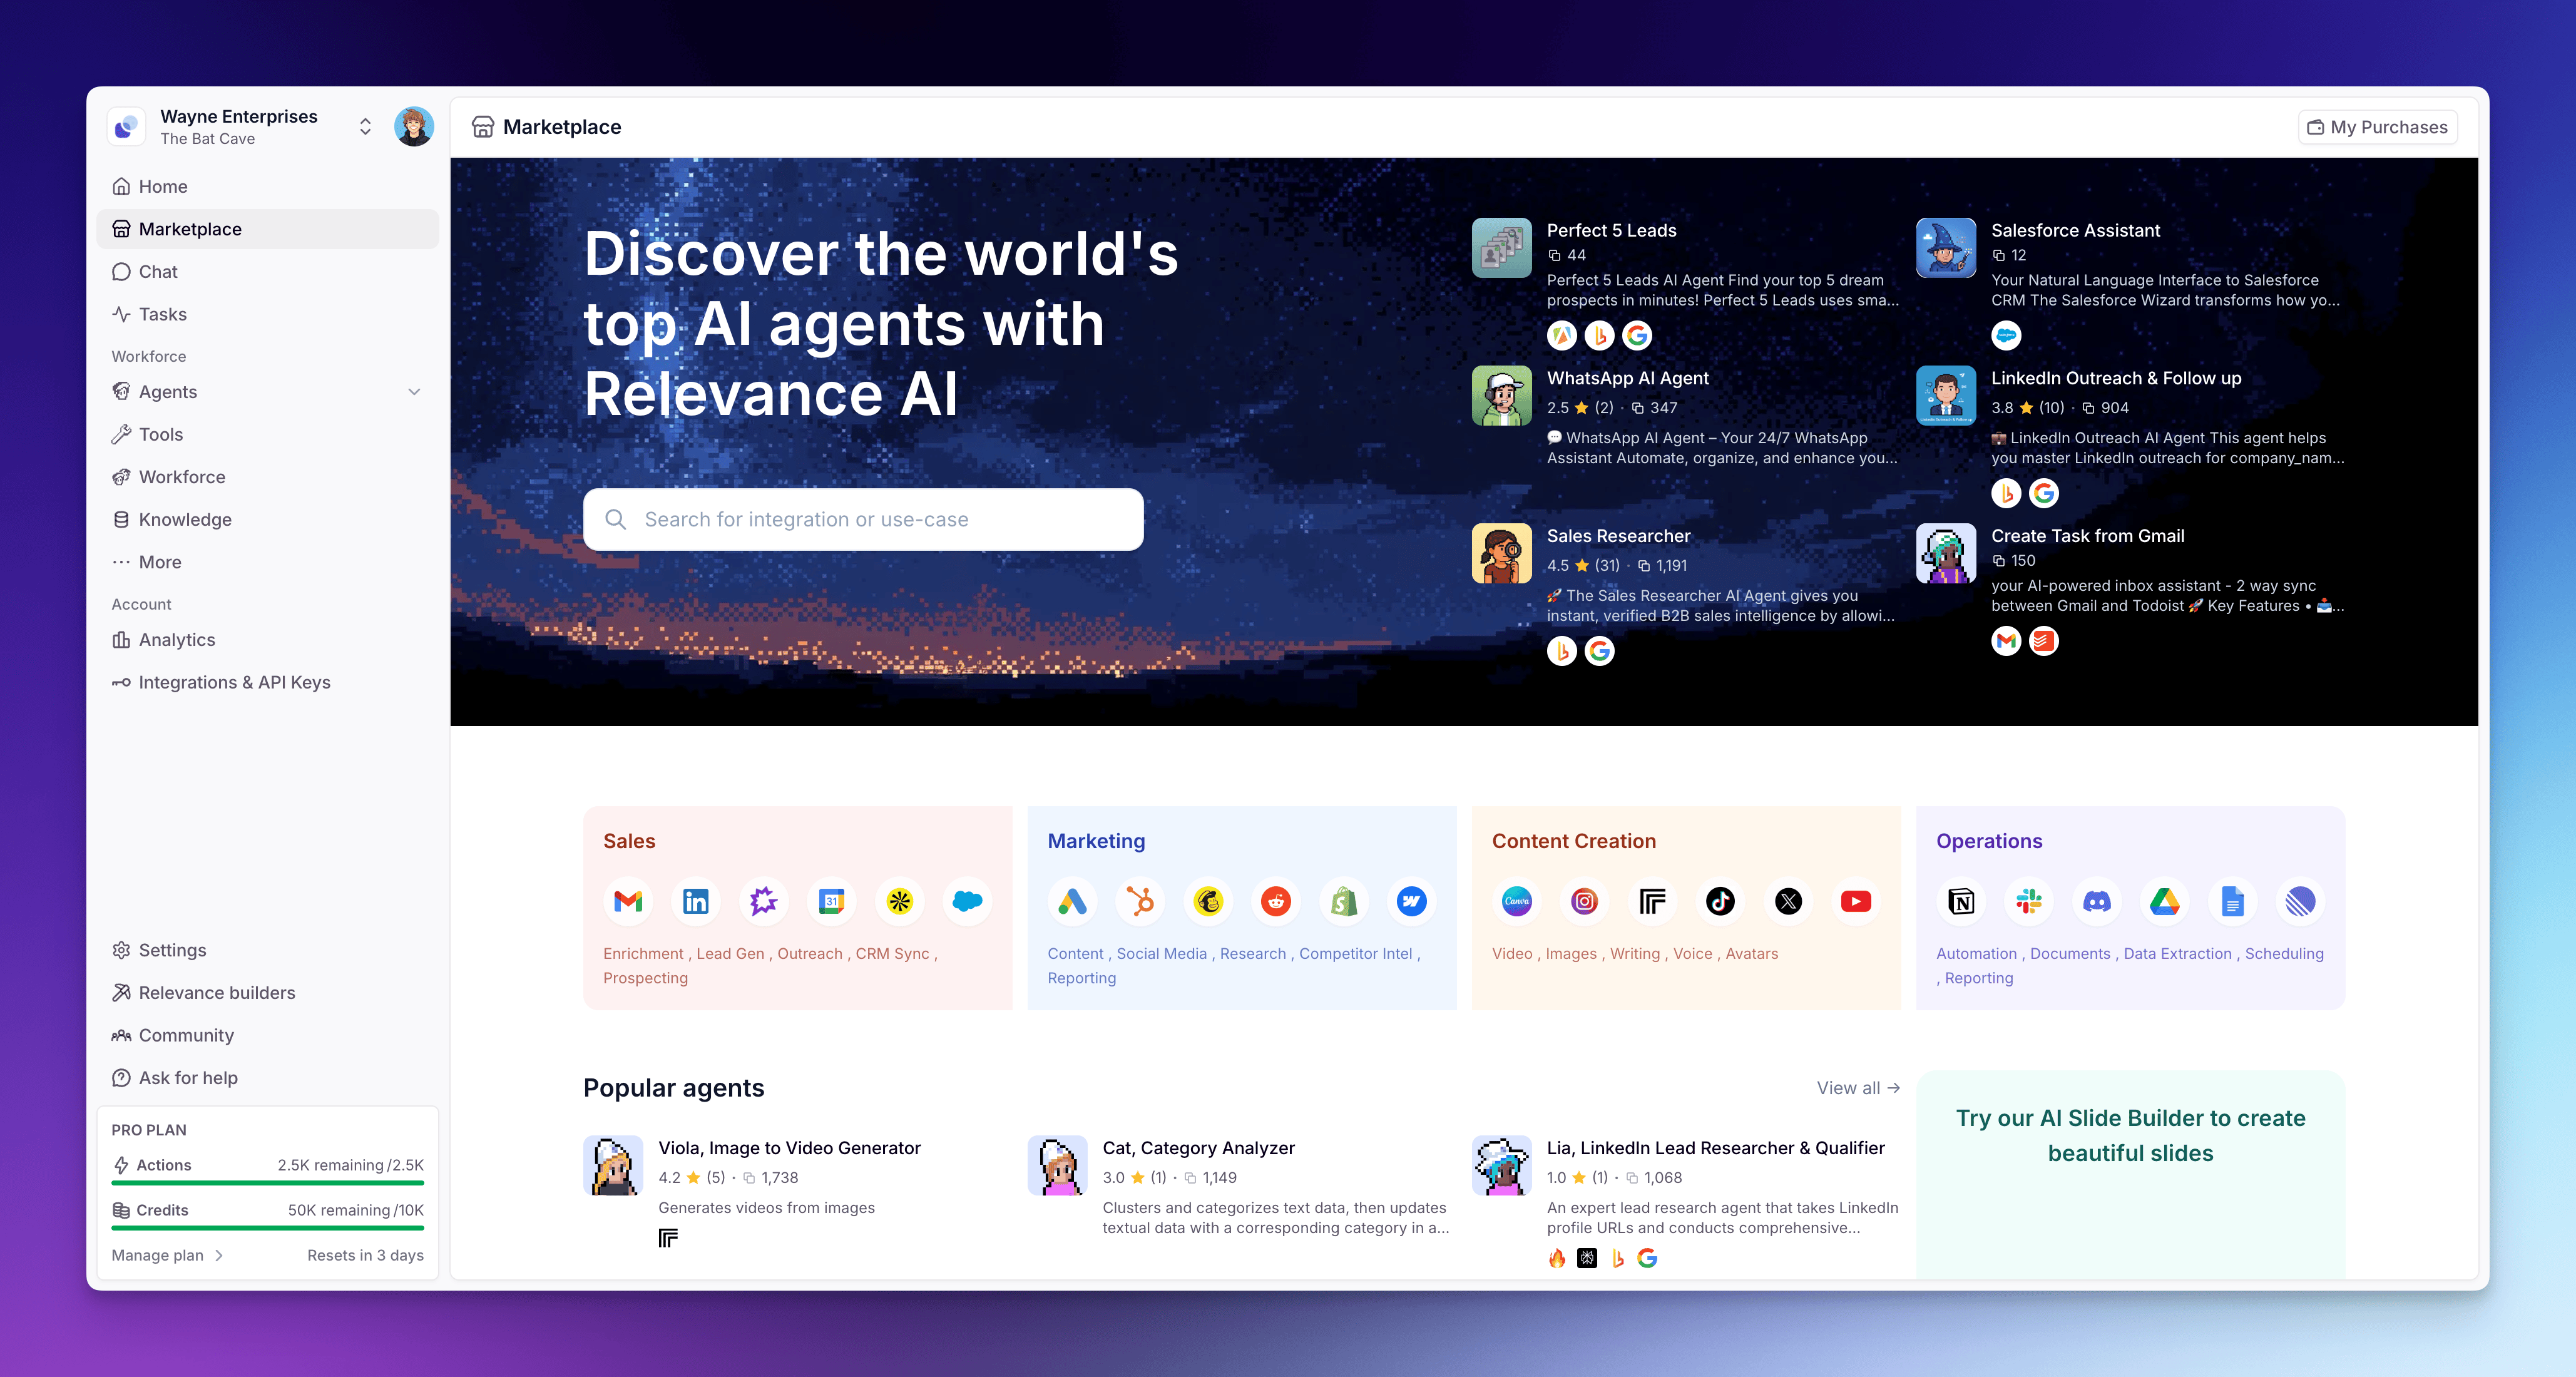 1. Go to [Marketplace](https://marketplace.relevanceai.com/) or click **Marketplace** in the left sidebar
2. Browse or search for an Agent that matches your use case
3. Click on the Agent to view its details
4. Click **Clone** to add it to your workspace
5. A setup popup will walk you through connecting any integrations the Agent needs — follow the prompts to link your accounts
6. Review the prompt, Tools, and settings — adjust anything you need
Great when you have a common use case — like lead qualification, meeting prep, or customer support — and want a proven starting point. Clone it, tweak it, ship it.
## Option 3: Build from scratch
Full control from the ground up. Best if you have a specific workflow in mind.
1. Go to [Marketplace](https://marketplace.relevanceai.com/) or click **Marketplace** in the left sidebar
2. Browse or search for an Agent that matches your use case
3. Click on the Agent to view its details
4. Click **Clone** to add it to your workspace
5. A setup popup will walk you through connecting any integrations the Agent needs — follow the prompts to link your accounts
6. Review the prompt, Tools, and settings — adjust anything you need
Great when you have a common use case — like lead qualification, meeting prep, or customer support — and want a proven starting point. Clone it, tweak it, ship it.
## Option 3: Build from scratch
Full control from the ground up. Best if you have a specific workflow in mind.
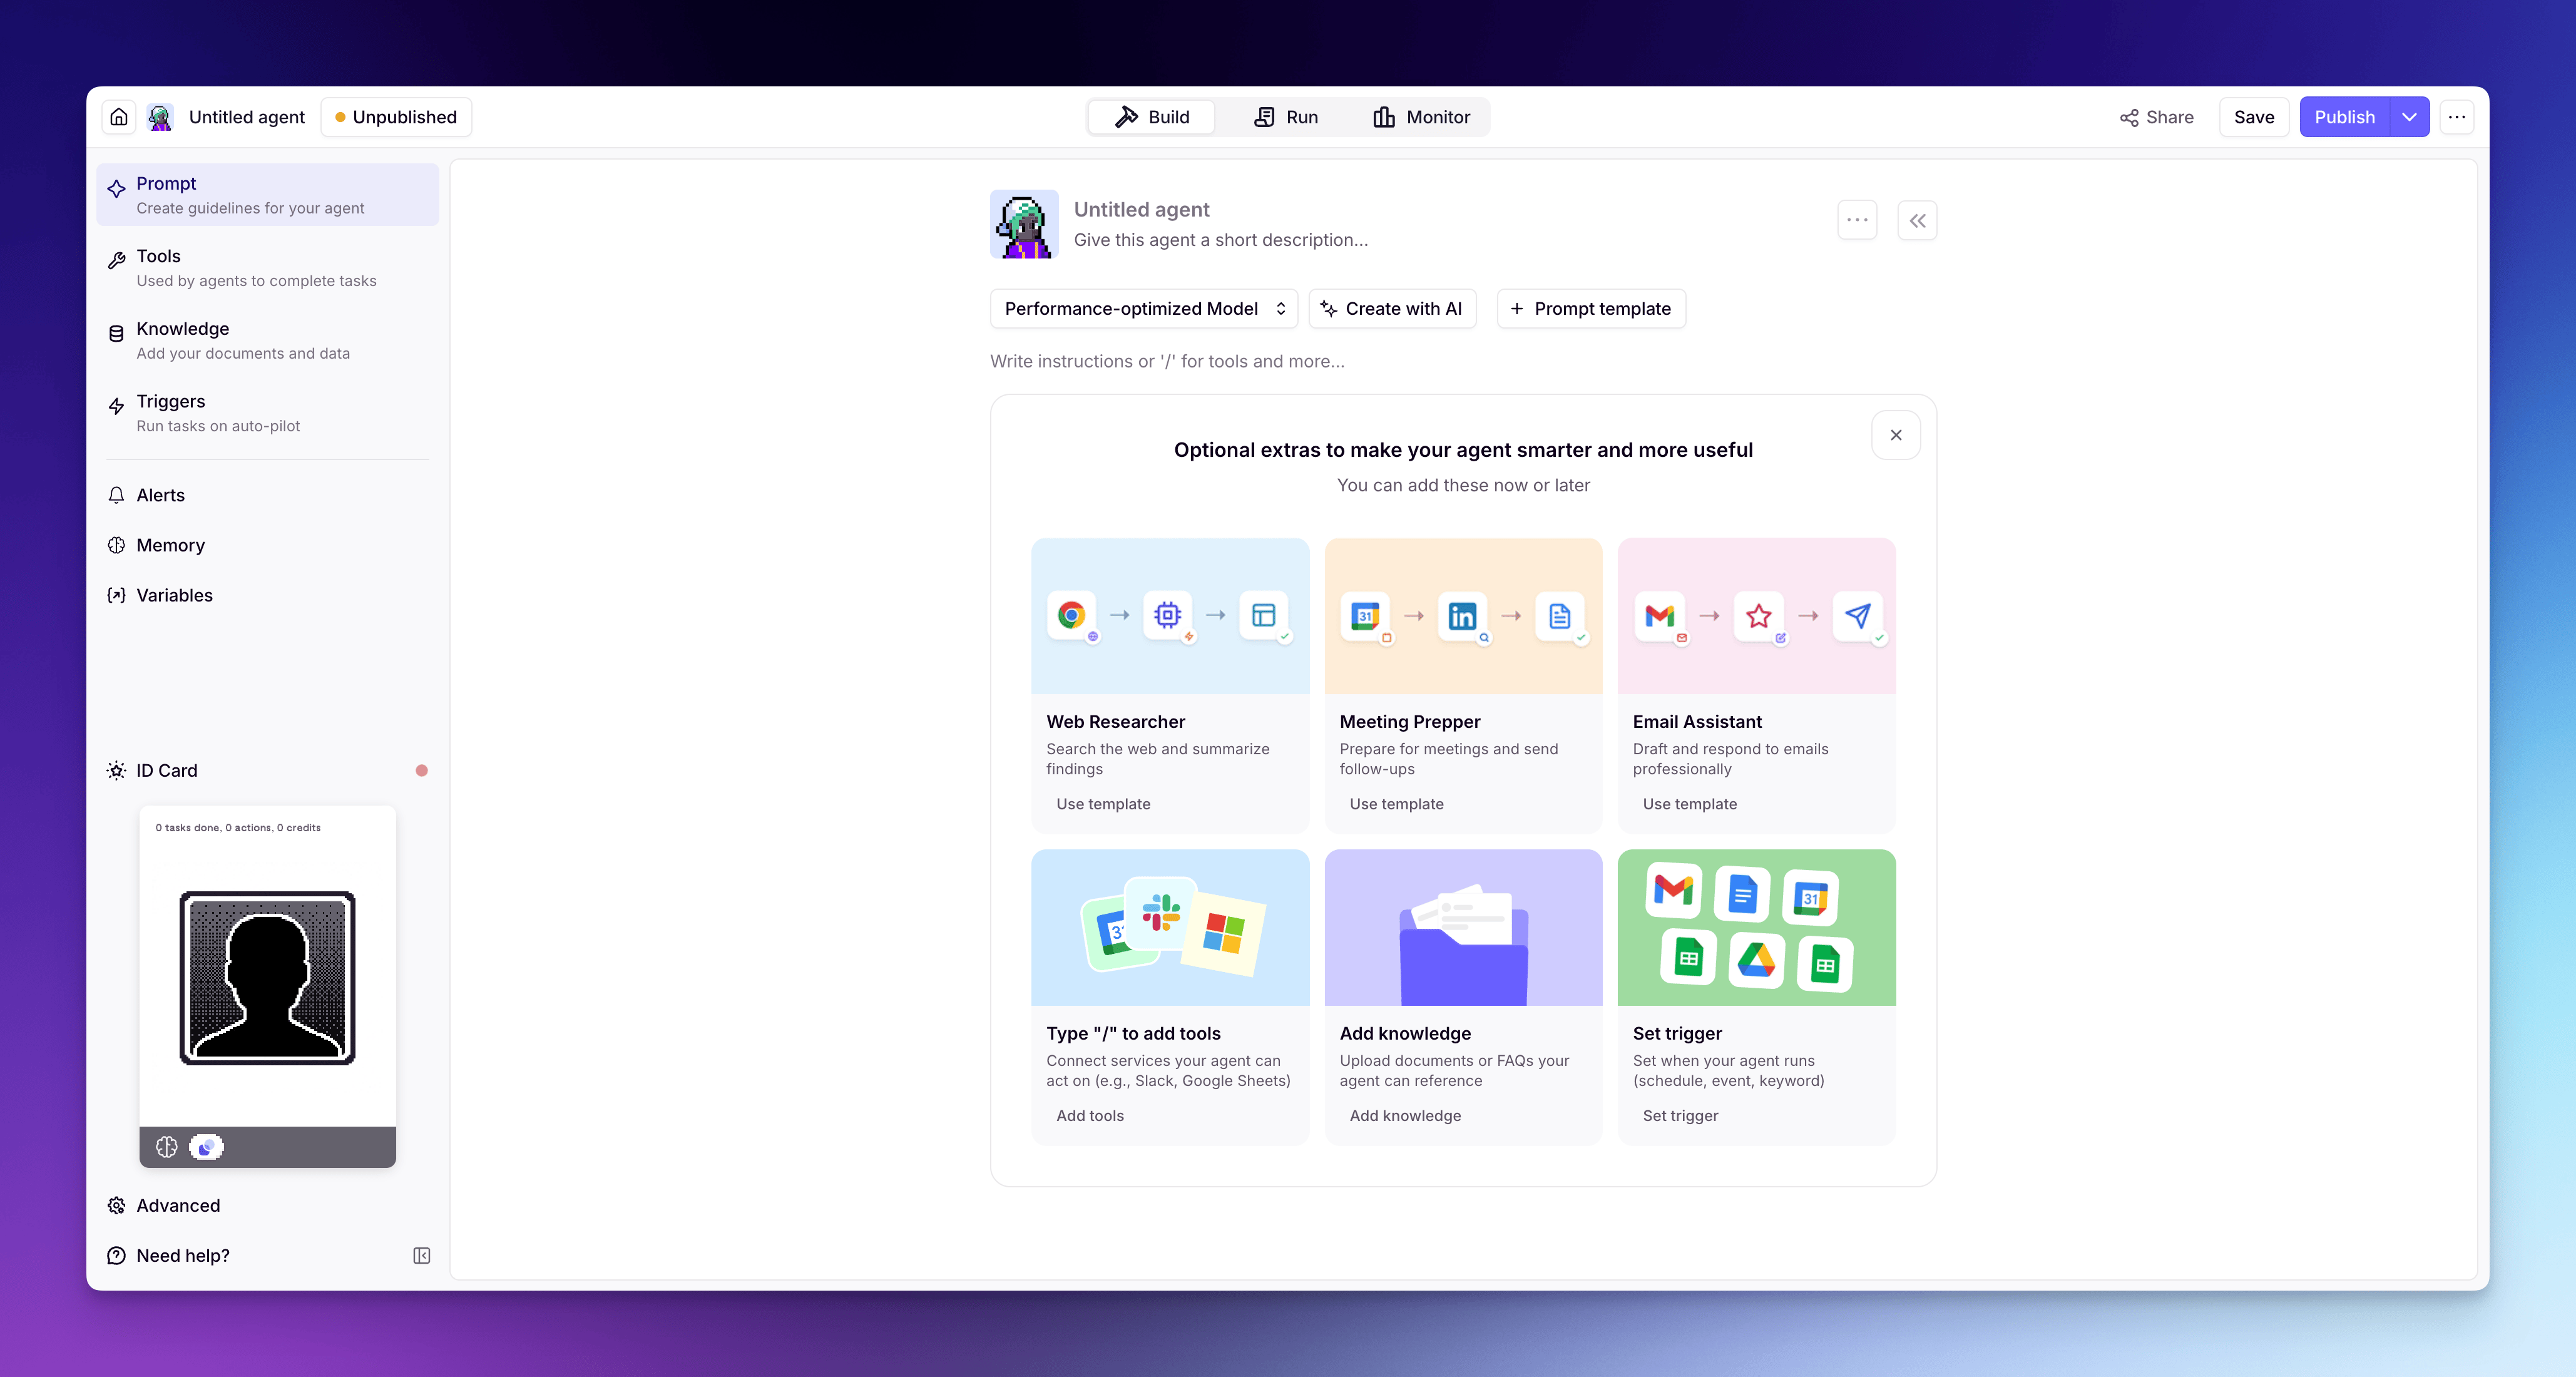 1. Click **Agents** in the left sidebar
2. Click **+ Create Agent**
3. Select **Start from scratch**
4. Write a [prompt](/build/agents/build-your-agent/prompt) — tell the Agent who it is, what it does, and how it should behave
5. Add [Tools](/build/agents/build-your-agent/tools) — give it the actions it needs (search the web, send emails, update your CRM, etc.)
6. Optionally add [Knowledge](/build/knowledge/create-knowledge) — upload docs or connect data sources for context
## What's next?
Once you've created an Agent, explore the rest of the build guides to refine it:
* [Prompt](/build/agents/build-your-agent/prompt) — write instructions that define your Agent's behavior
* [Tools](/build/agents/build-your-agent/tools) — give your Agent the actions it needs
* [Triggers](/build/agents/build-your-agent/triggers) — run your Agent automatically on a schedule, from a webhook, or from an integration
* [Alerts](/build/agents/build-your-agent/alerts) — get notified when your Agent needs attention, and define when it should loop in a human
* [Memory](/build/agents/build-your-agent/memory) — configure how your Agent retains context across conversations
1. Click **Agents** in the left sidebar
2. Click **+ Create Agent**
3. Select **Start from scratch**
4. Write a [prompt](/build/agents/build-your-agent/prompt) — tell the Agent who it is, what it does, and how it should behave
5. Add [Tools](/build/agents/build-your-agent/tools) — give it the actions it needs (search the web, send emails, update your CRM, etc.)
6. Optionally add [Knowledge](/build/knowledge/create-knowledge) — upload docs or connect data sources for context
## What's next?
Once you've created an Agent, explore the rest of the build guides to refine it:
* [Prompt](/build/agents/build-your-agent/prompt) — write instructions that define your Agent's behavior
* [Tools](/build/agents/build-your-agent/tools) — give your Agent the actions it needs
* [Triggers](/build/agents/build-your-agent/triggers) — run your Agent automatically on a schedule, from a webhook, or from an integration
* [Alerts](/build/agents/build-your-agent/alerts) — get notified when your Agent needs attention, and define when it should loop in a human
* [Memory](/build/agents/build-your-agent/memory) — configure how your Agent retains context across conversations